
Create your first process#
Build a small working process that plays a sound. You stay in the Godot Editor the whole time. You will not write code.
Requirements#
You need a working demo project before you start. That base lets you test your first process right away.
Install Godot 4.7 in the .NET edition. Install .NET SDK 8. Check that Git is on your machine. Then fetch the TinkerFlow-Debug demo project.
Download the demo project as a zip file.
Open project.godot with Godot 4.7 .NET editor.
Run Scenes/SampleScene.tscn once to check the setup works.
Full setup can be found here: Getting started.
Create a new Godot scene#
Start from an empty scene. You need a clean place for the process to live.
Go to the Scene dock on the left. Click the button for a 3D scene in the Create Root Node panel. Then open the TinkerFlow tab in the top bar.
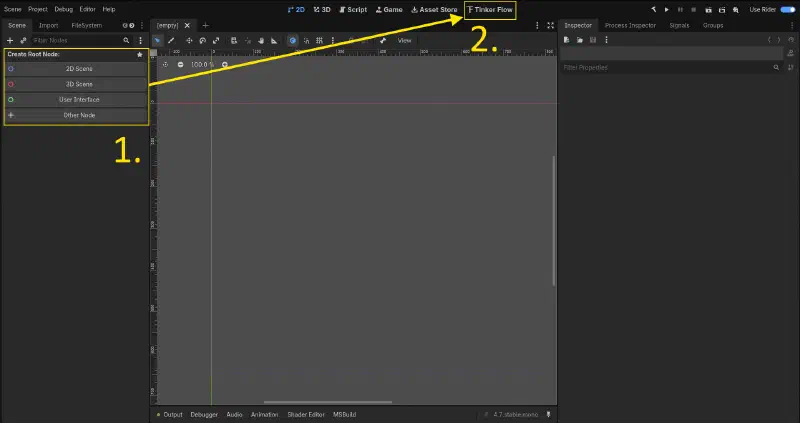
The TinkerFlow welcome screen appears with the quick start button. You are ready to add a process!
Create a new process#
You have a scene but no process yet.
Create the process now so you have something to add steps to.
Look at the centre of the TinkerFlow tab and click the Create button.
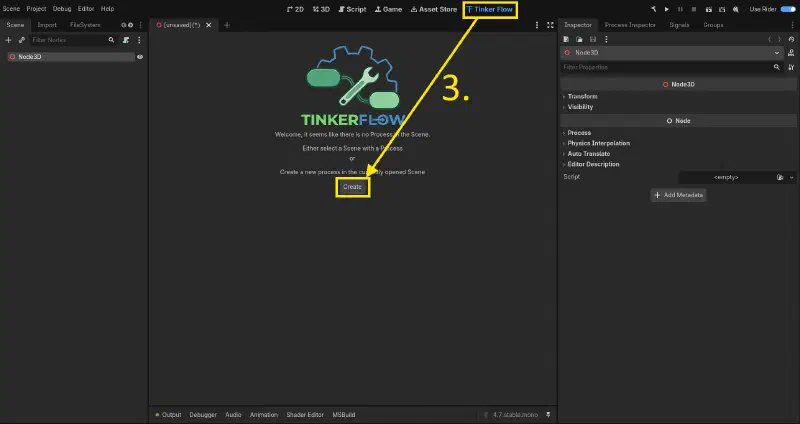
The welcome screen closes. A TinkerFlow node with RuntimeConfigurator and SceneHandler under it will be added to the scene and the welcome screen change to the ProcessEditor. The Chapters panel lists Chapter 1 for the new process.
One additional step to work with the process. Save the new-created scene now so to run later. Open the Scene menu at the top left. Click Save Scene.
(You can also press Ctrl+S as well)
Click the Save button after typing a fitting name.
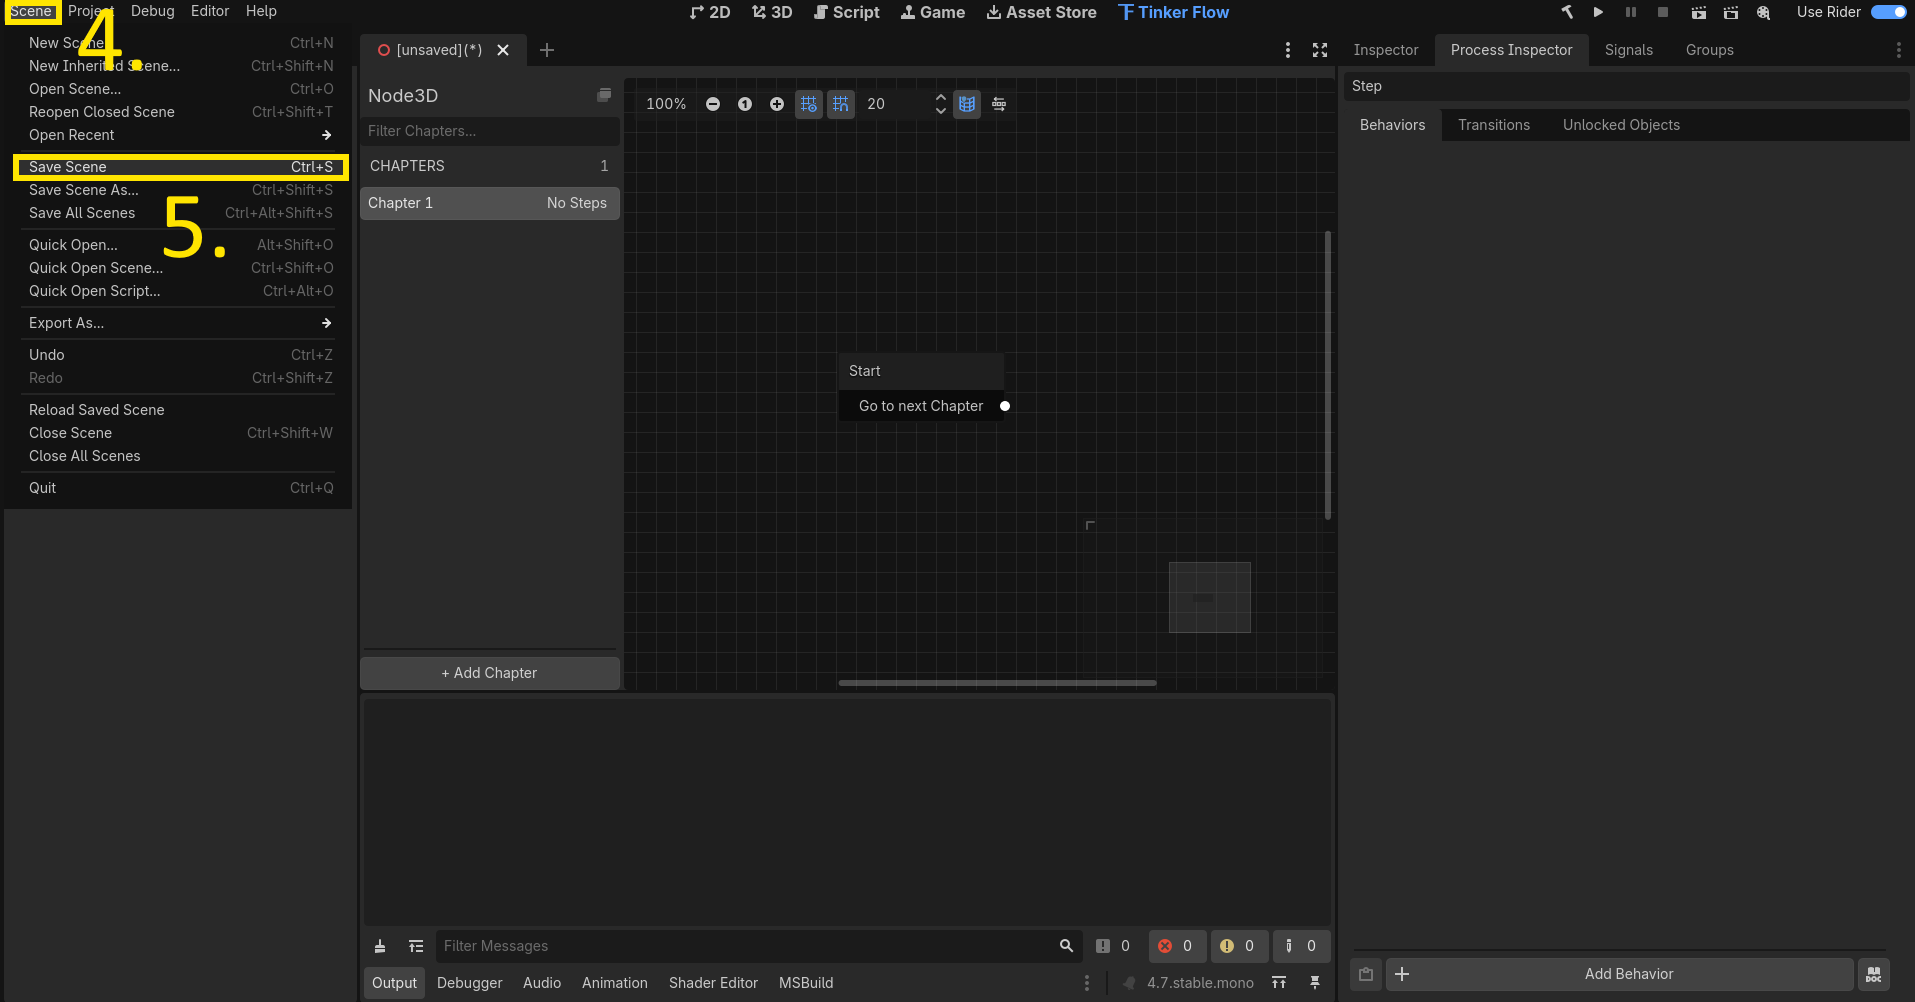
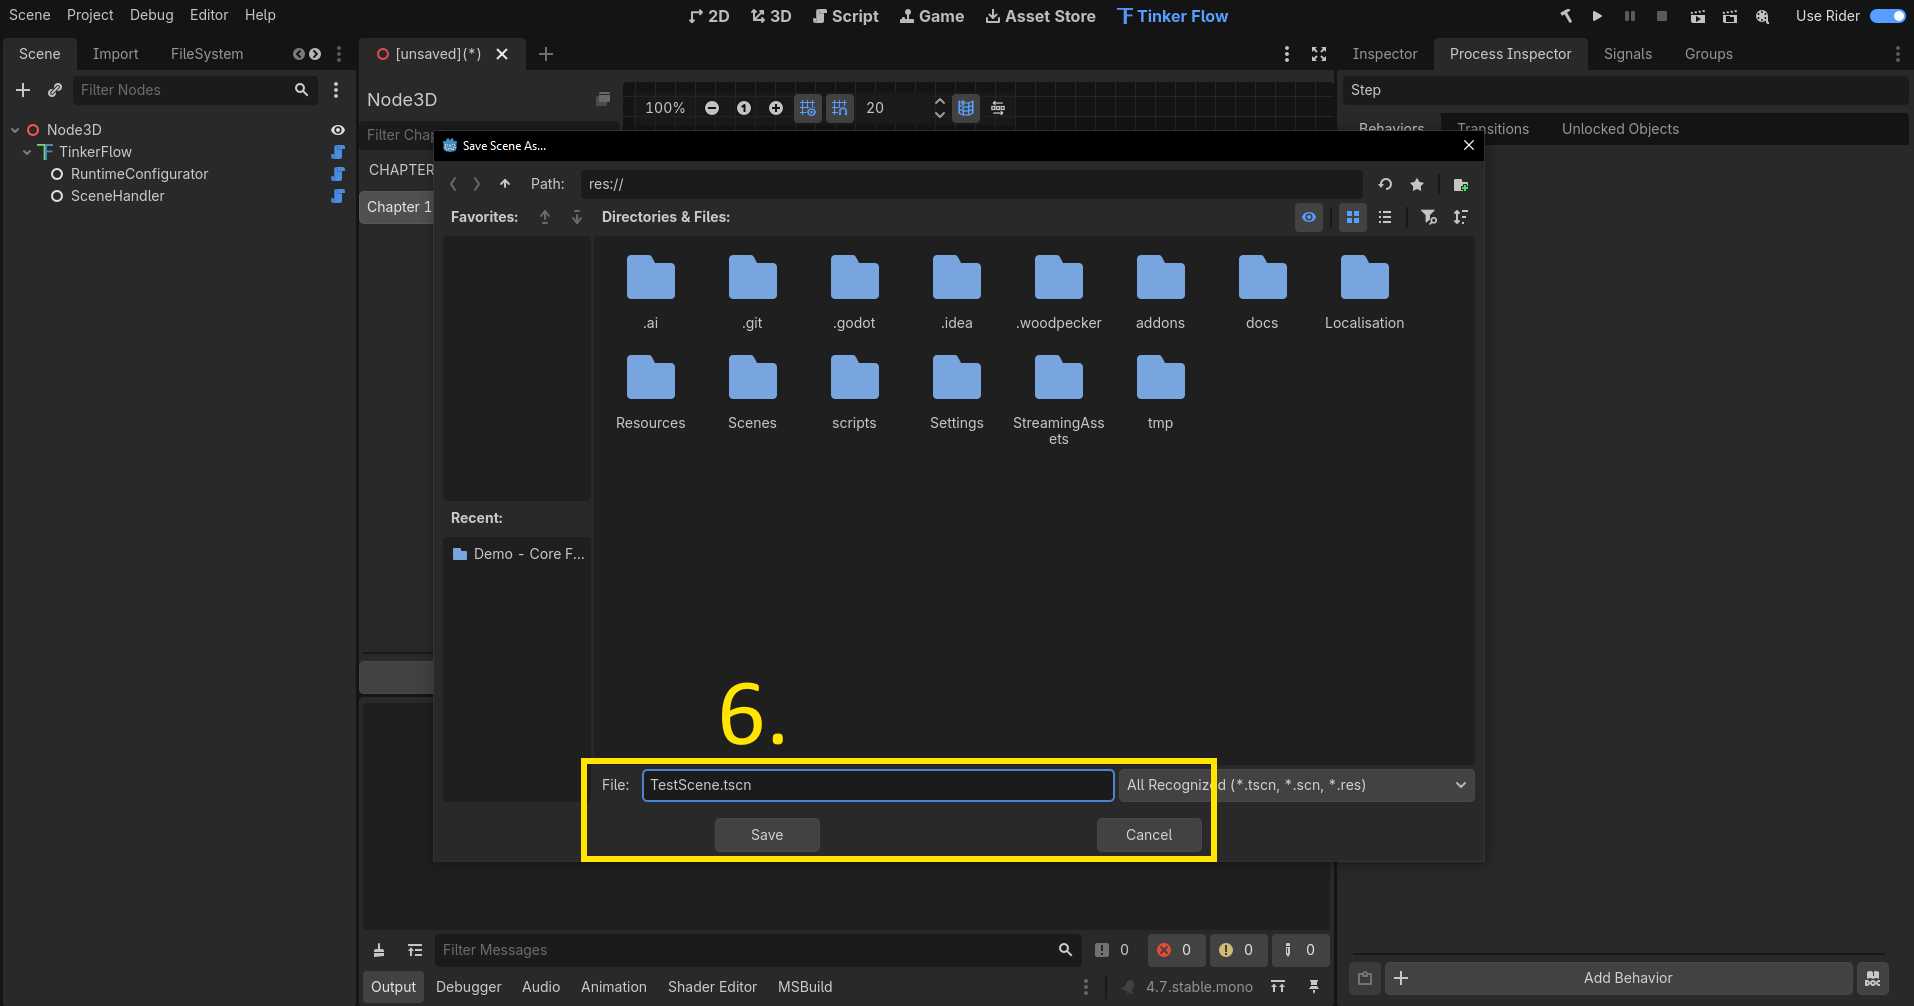
The dialogue closes. The tab drops the [unsaved] mark and shows the new name.
Add step#
Your chapter does nothing yet.
Just the start step is inside the chapter now. Add a Step so the chapter and process have one piece of work to run.
Click the Process Inspector tab on the right. (Right click empty grid).
Click Step under New. The same menu also holds Parallel, Step Group, and End Chapter (but this will come later).
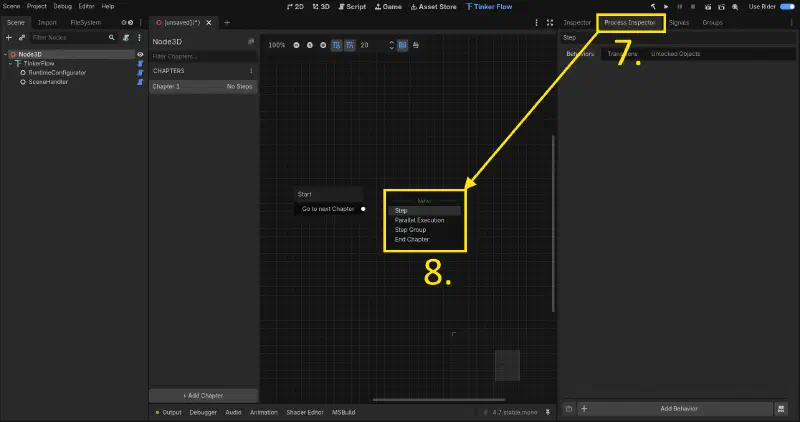
A new Step node is added in the graph. It sits unwired at first.
So connect it by left-clicking on the white dot of the start chapter, Hold it, and drag to the inlet dot on the left edge of the Step.
Now the chapter knows when to run it after the start.
A white line now links the step. The line shows the order the chapter follows, from the start step to the next step. If there is no step the next chapter will be loaded. If there are no chapters, the process will end.
This order matters because later parts attach to this Step.
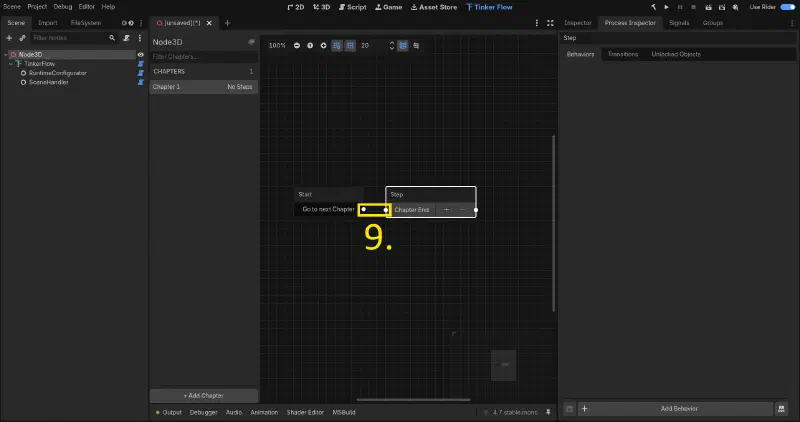
If no line appears, the drop missed the dot. Release with the tip directly over the dot, and the line will stay. A solid link means the connection is set.
Add transitions#
Your Step has no exit yet. Add a transition so the flow can finish the Step and move on.
Go to the bottom bar of the Process Inspector. Click Add Transition. Drag from its outlet dot on the right to the inlet dot of the target. A line appears. Click Add Condition. Click Timeout in the list. Use Timeout for a short test. The list also shows ObjectInCollider and InRange.
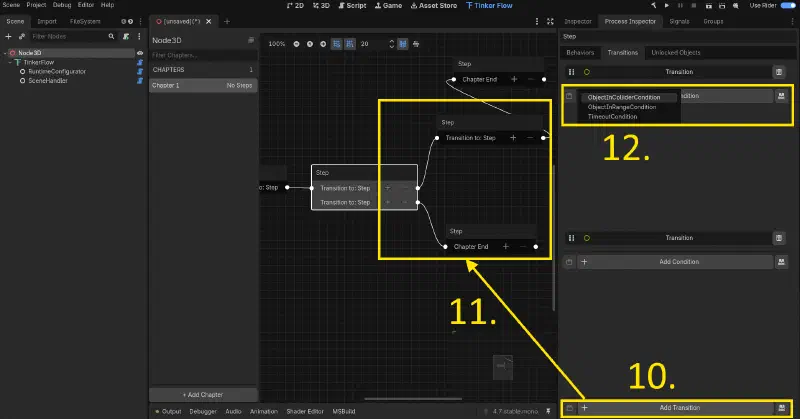
The Step gains a Transition row. The condition sits under it. The graph shows the new link. Your Step can now end on its own.
Add behavior#
Your Step runs but will do nothing.
Start to add a behavior, e.G. PlayAudioBehavior, that plays sound when the Step runs.
Click the Behaviors tab on the right and then at add Behavior at the bottom.
Click PlayAudioBehavior in the list.
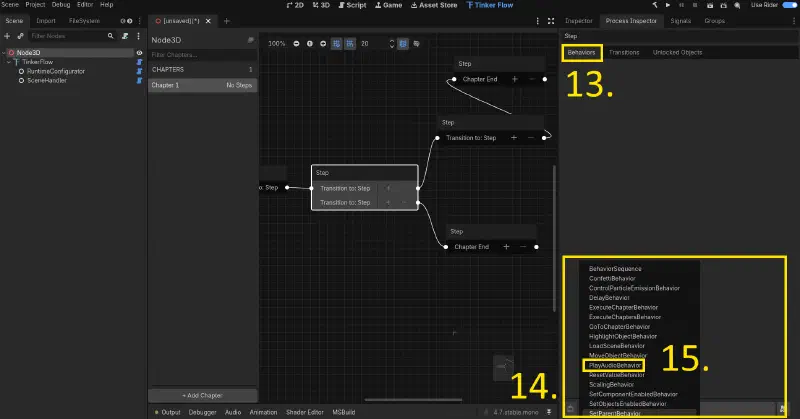
The inspector adds a PlayAudioBehavior inside the list.
Audio source and Audio Resource is
That empty state is normal before linking. You link both next.
Godot needs a player node to hear it. So add that player now to the scene.
Go to the Scene dock.
Right click Node3D.
Click Add Child Node.
The Create New Node dialog opens.
Type audio in the Search field.
Click AudioStreamPlayer3D in Matches.
Click Create at the bottom.
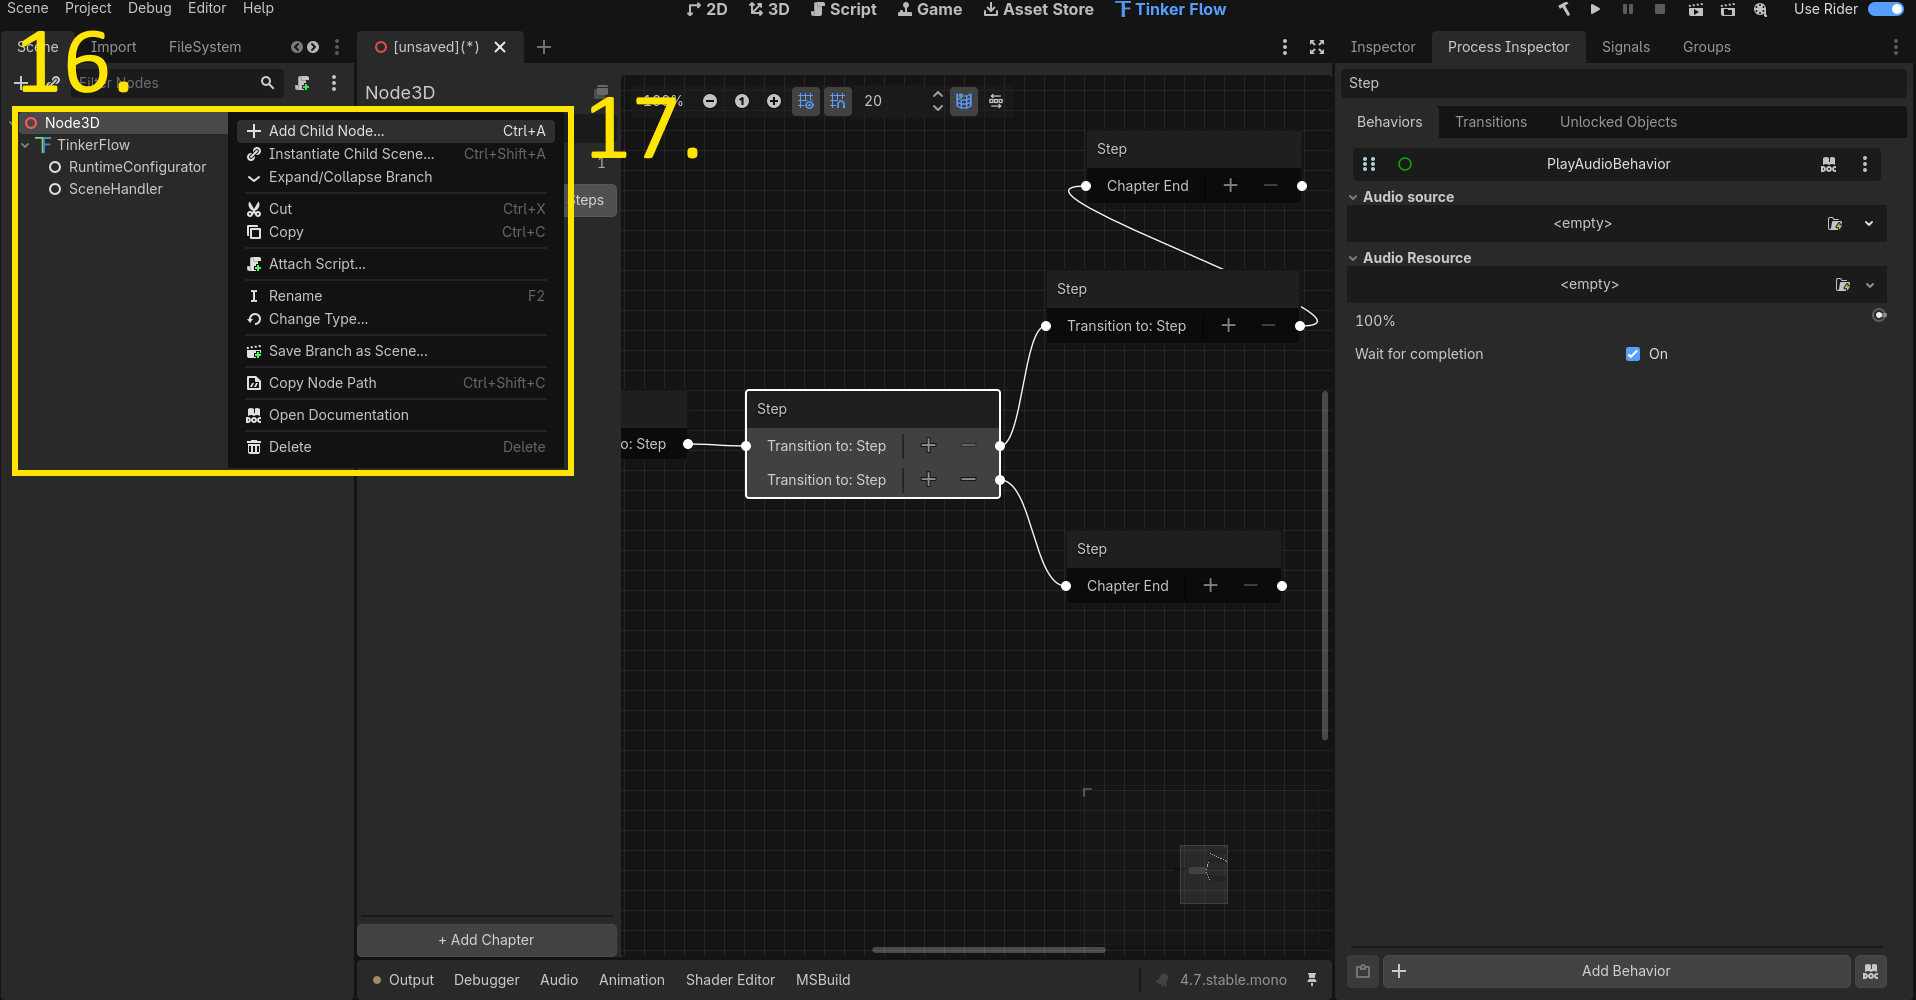
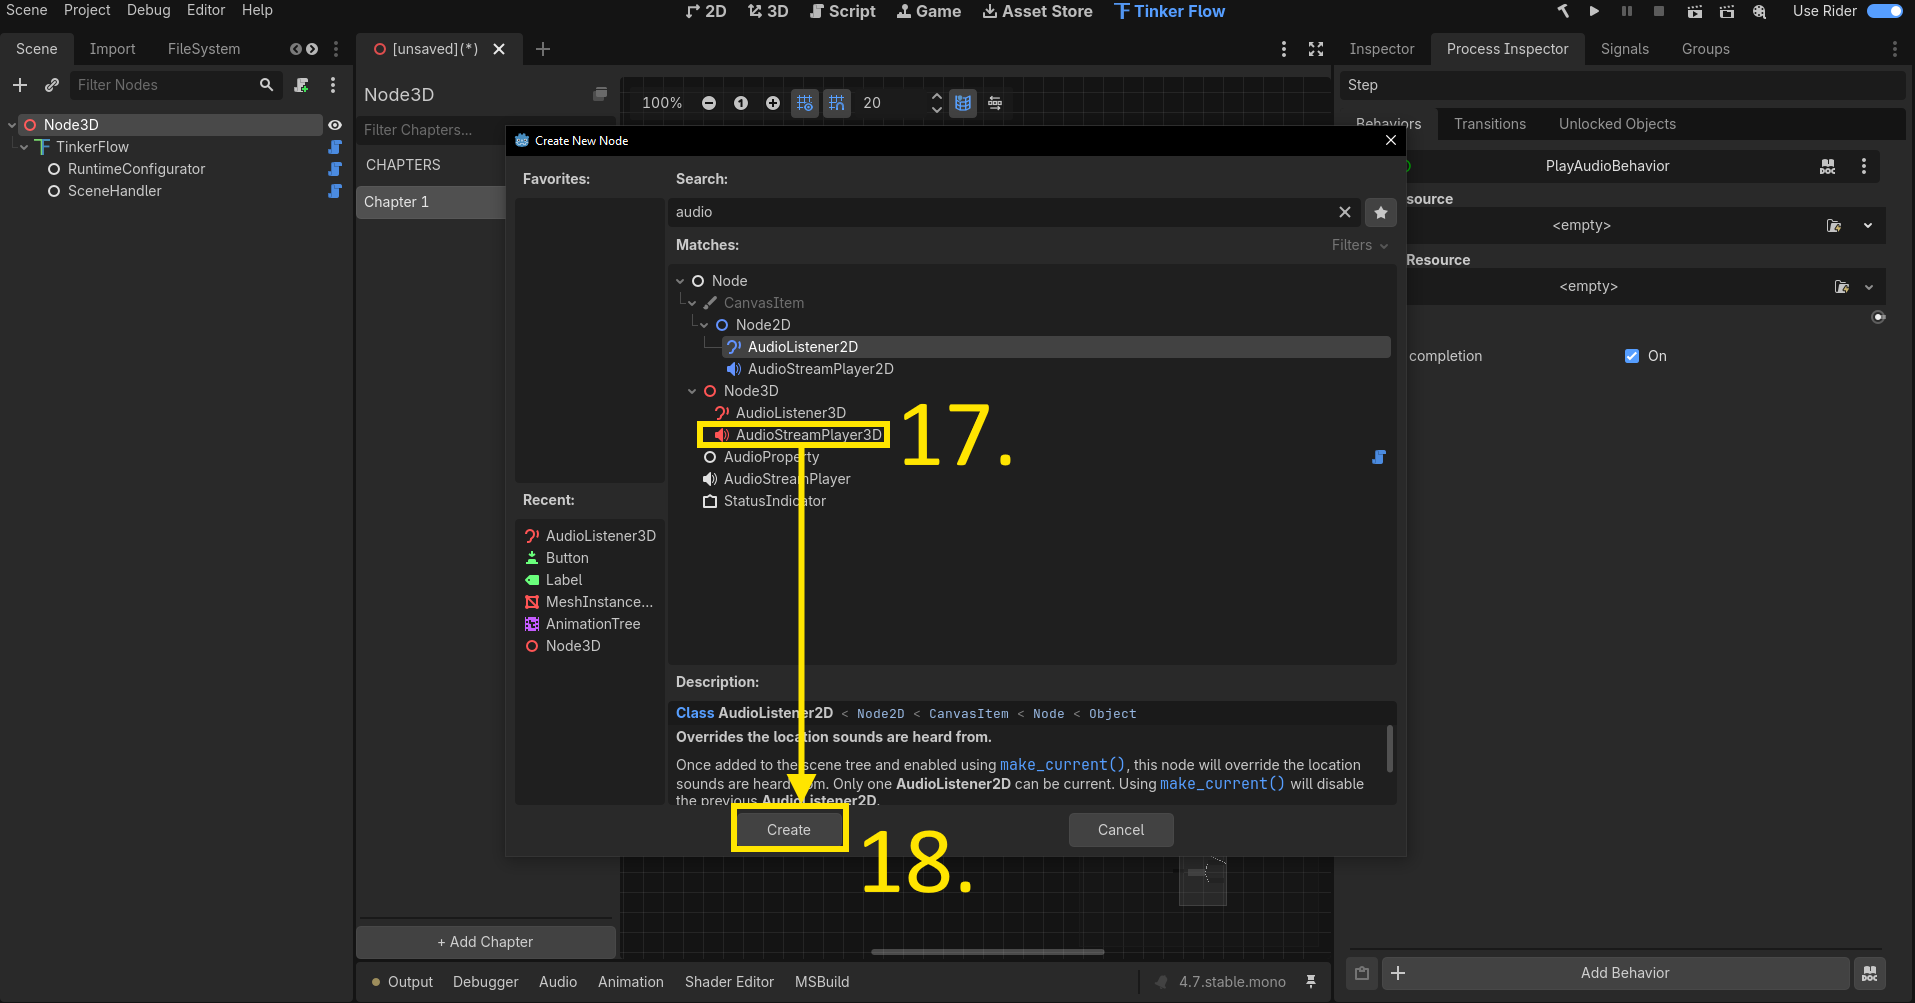
The Scene dock lists AudioStreamPlayer3D under Node3D.
Click that new entry to select it.
Link the player to the behavior over drag and drop so the empty warning goes away.
Select AudioStreamPlayer3D.
Its row stays selected in the Scene dock.
Go to the Audio source row on the right.
It reports a missing IAudioPlayer.
Click Fix it.
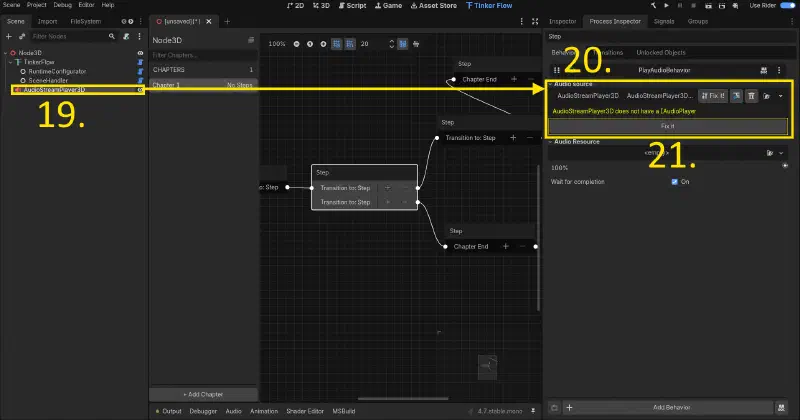
The yellow warning disappears. The Fix it buttons goes away. The Audio source row now shows a Scene Reference. One half is linked.
You still need a sound file. Pick one now so the behavior has audio to play.
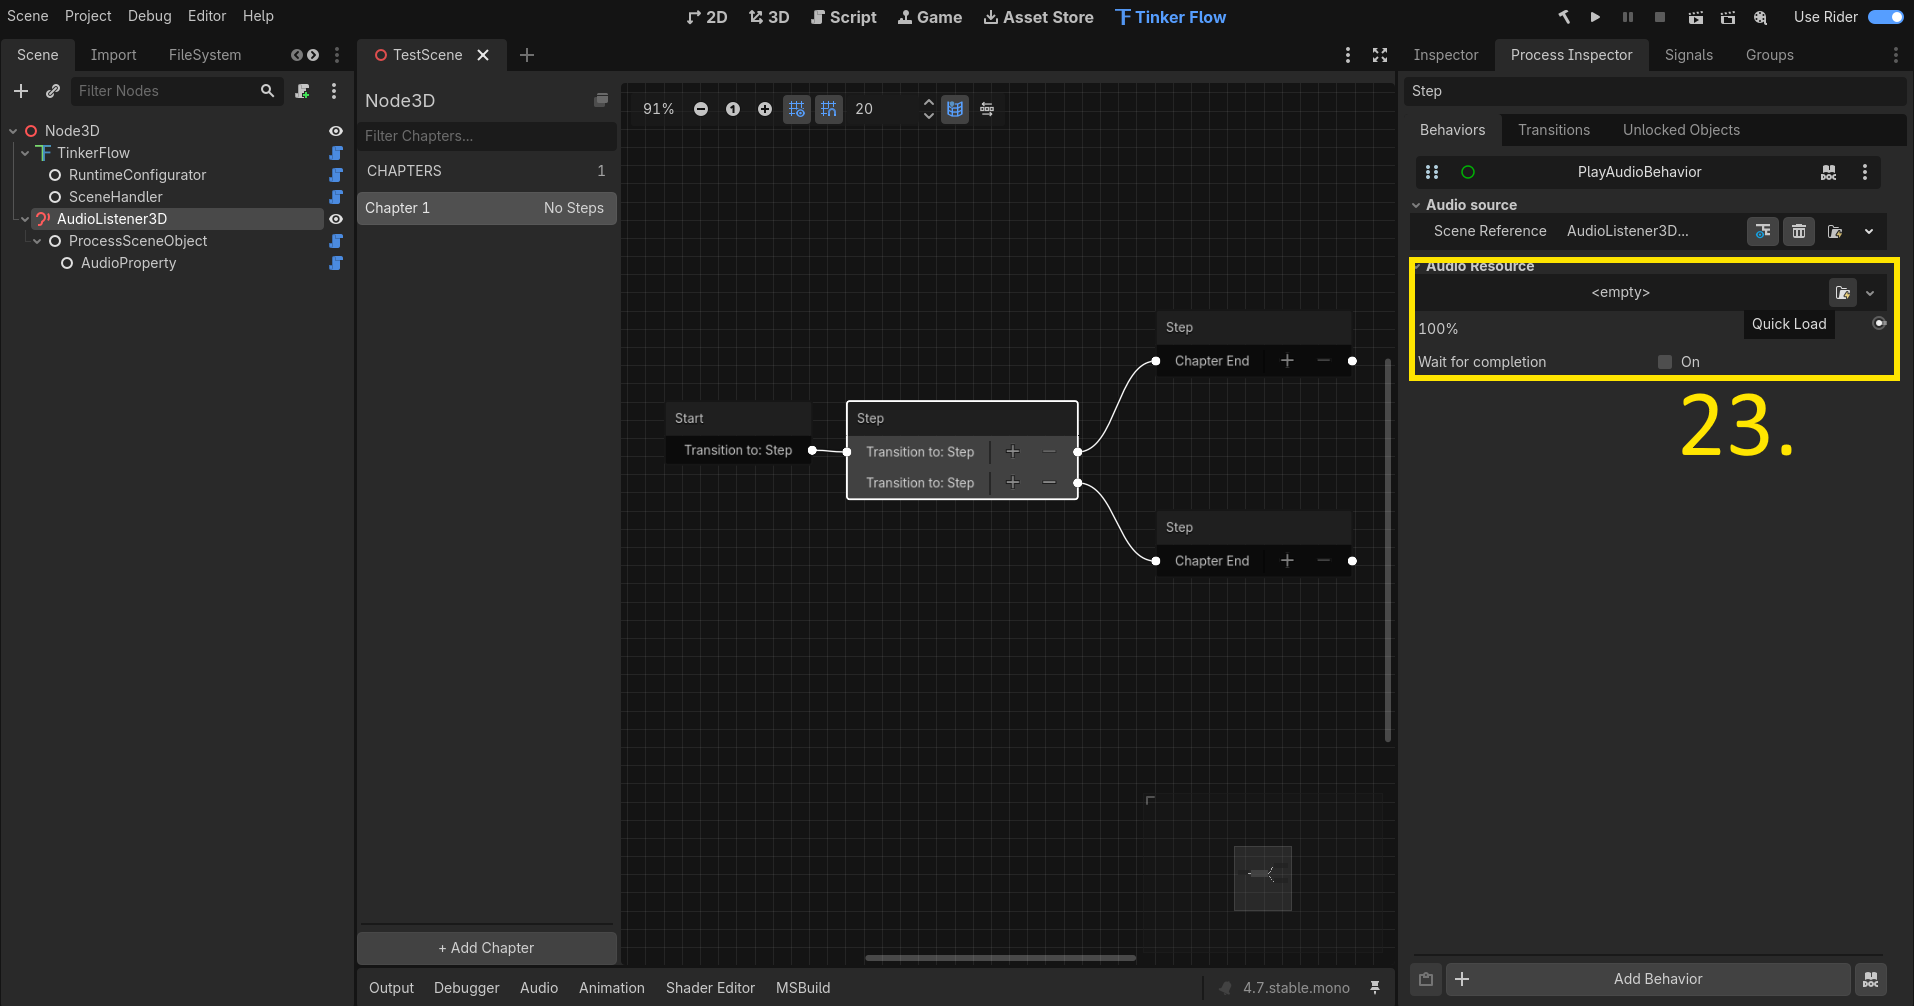
So, go to the Audio Resource picker on the right.
It shows
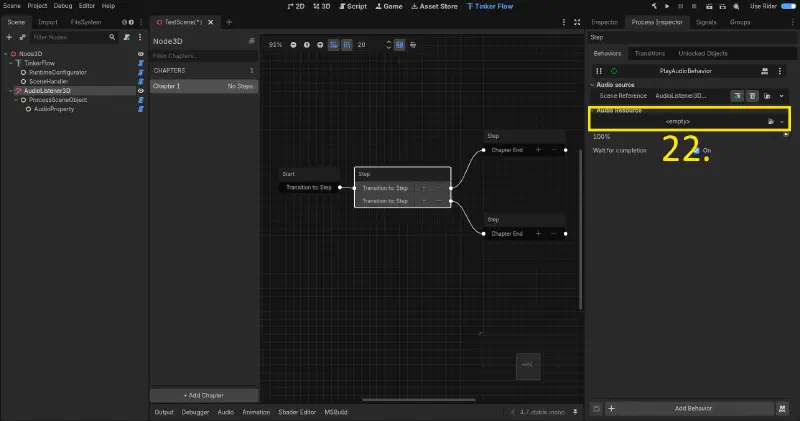
A small picker opens. It offers Quick Load. Use it to find the file.
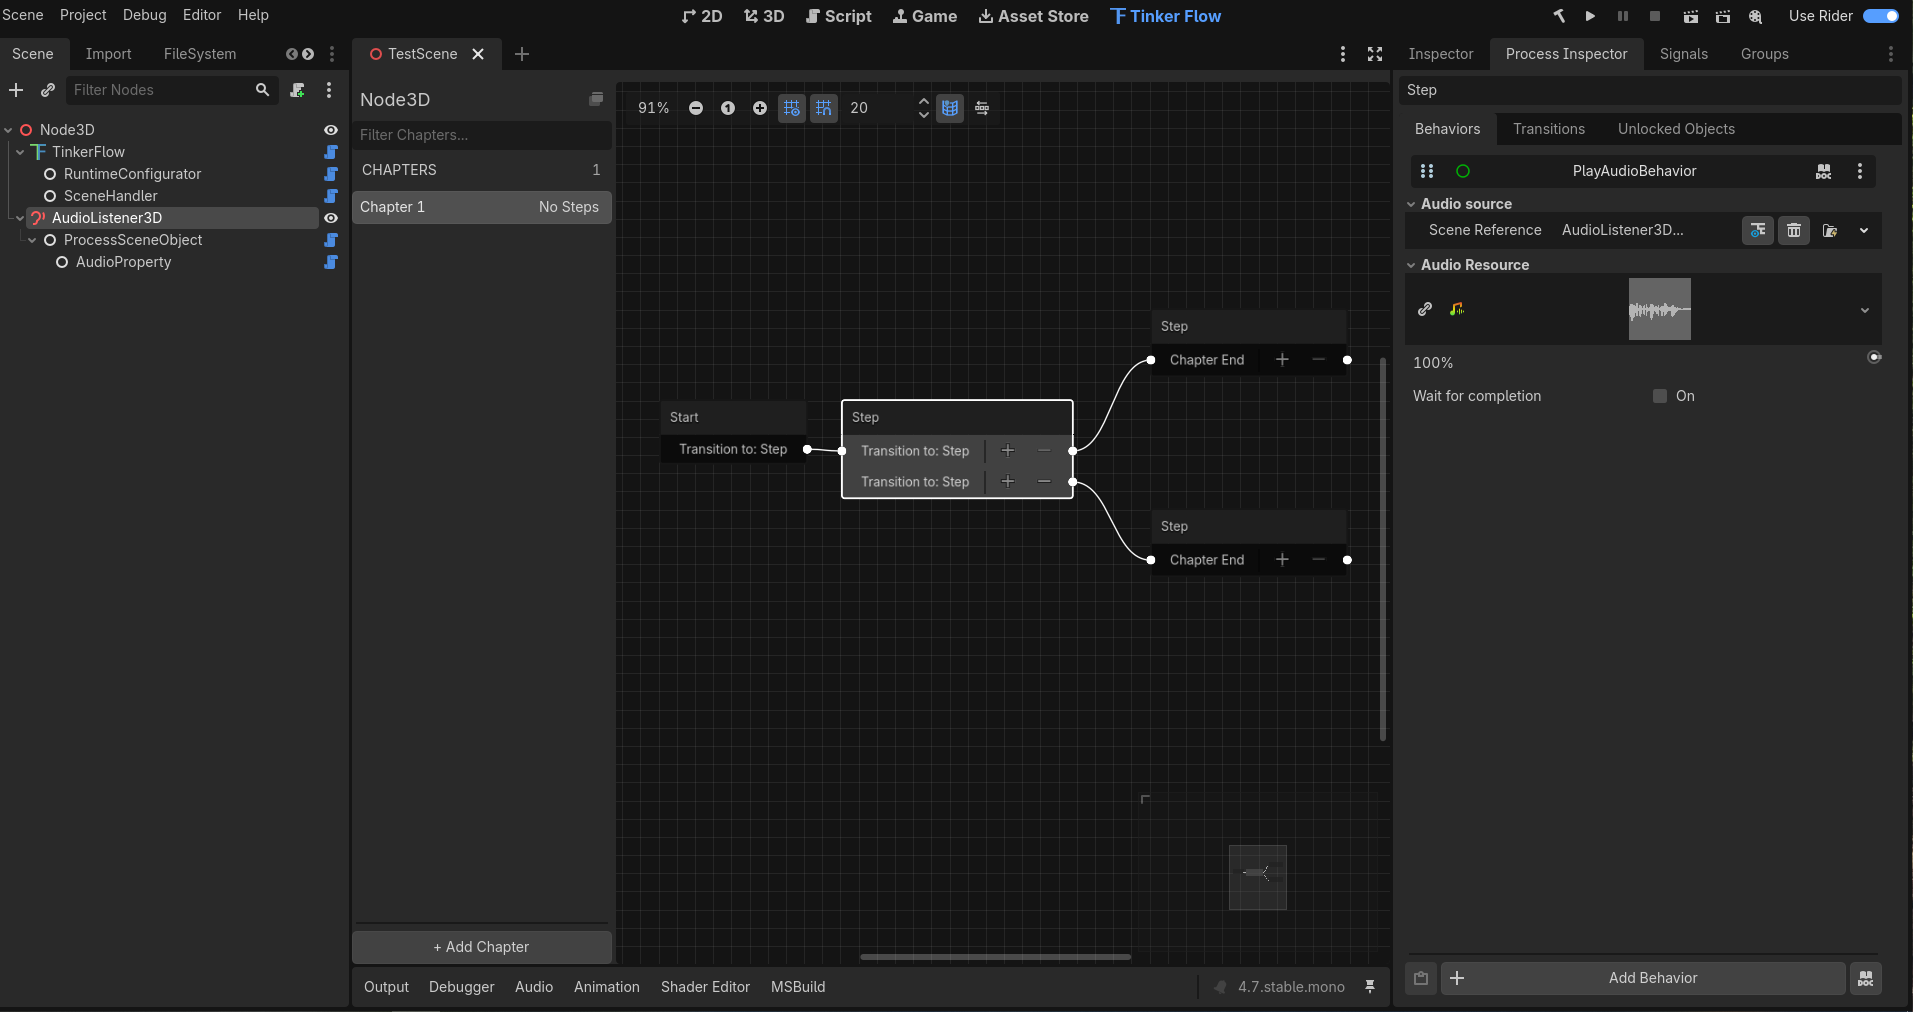
Click the Quick Load entry. Then pick the sound file. After you pick it, the inspector shows the selected file.
That view tells you the file is linked. You will see a link icon with a grey block in a wave shape.
Nicely done!
Play scene#
Now you can test your work.
Run this scene alone so you hear the result without starting the full game.
Go to the Run Current Scene icon in the top right.
You can also press F6 to start the scene.
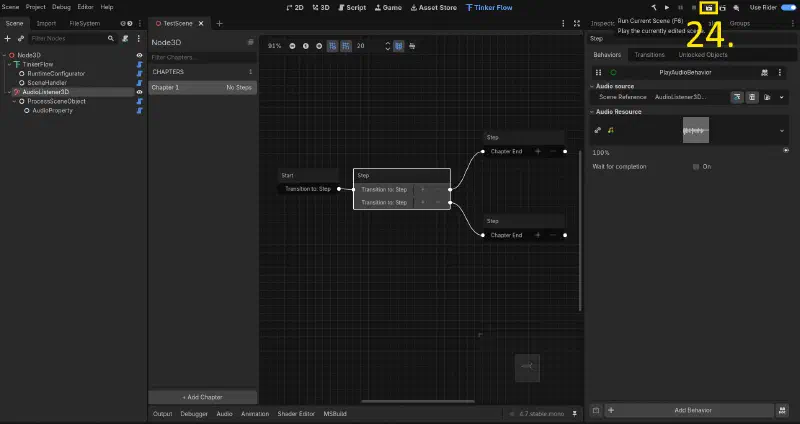
Godot runs will run the scene.
The step starts and the audio plays.
Congrats, you created your first process!
Your scene now has a process with one step. That step holds a transition and an audio behavior.
Reuse the same pattern to add more steps.